Introduction to Skydive workflows
by Sylvain Baubeau, 29/08/2018Since version 0.19, Skydive allows you to automate Skydive actions using a new type of object called workflows.
Let’s imagine you want to test the connectivity between 2 containers. If you had to do it manually, you would:
- create a capture on the interface of each container
- generate some traffic using the packet injector
- use a Gremlin query to check for flows corresponding to the generated traffic
- delete the captures
In this blog post, we will see how you can script these actions using workflows.
Workflows are JavaScript
Skydive workflows are written in JavaScript. Why JavaScript you may ask ? Since a pretty long time now, Skydive has an embedded JavaScript engine that can be used to write complex alerts. JavaScript is also the only language that you can use in every browser. With NodeJS, JavaScript became a first class language to write ‘real’ applications. Therefore, using JavaScript allows us to write JavaScript programs that can be executed:
- from the Skydive command line shell (using
skydive client shell) - from inside a browser (using the new
Workflowstab in the Web interface) - from a program written in NodeJS
- from Skydive itself (using the JavaScript engine embedded into the Skydive analyzer)
In this blog post, we will use the first 2 methods to develop and execute our workflow.
Some JavaScript hacking
Hello World
Seriously, did you really expect to avoid an Hello World ! example in such a blog post ? For this example, we will use
the Skydive command line shell. When starting it, we will be welcomed with the following prompt:
$ skydive client shell
skydive>
You can write JavaScript just like in the Console of your browser or when using the node command. Let’s now write
our Hello World.
skydive> console.log('Hello world !')
Hello world !
Coding in a prompt is not very convenient. You can pass a JavaScript file to the shell instead of writing into the console. Exit the shell using Ctrl^D then create a file with our “Hello World” and execute it:
$ cat > hello-world.js <<EOF
console.log('Hello world !')
EOF

$ skydive client shell --script hello-world.js
Hello world !
A more complicated example
In this example, we will create a simple API between 2 nodes.
First, let’s create a file create-capture.js with the following content:
function CreateCapture(from, to) {
    var capture = new Capture();
    capture.GremlinQuery = "G.V().Has('TID', '" + from + "').ShortestPathTo(Metadata('TID', '" + to + "'))";
    return client.captures.create(capture);
}
Then let’s execute this function:
$ skydive client shell --script create-capture.js
skydive> CreateCapture("123", "456").then(function (capture) {
    console.log("Capture created ! :-)")
    console.log(capture)
}, function (e) {
    console.log("Capture not created ! :-(")
    console.log(e)
})
If everything is fine, you should have the output:
> Capture created ! :-)Our CreateCapture returns a JavaScript Promise
(itself returned by the client.captures.create function). The reason is that, to create the capture, an HTTP call to the Skydive
API is done. The actual API will only be done when the Promise is realized with the call to the then function.
We provide two functions to this then function:
- the first one will be called if the call is successfull
- the other one will be called if an error occurred
Promises are particularly usefull when you need to chain calls and that’s exactly what we are going to do with the real workflow we want to implement in this blog post.
But before that, we will create a simple workflow based on this simple JavaScript example:
Our first workflow
A Skydive workflow is composed of:
- a name and an optional description of what the workflow does
- the parameters to pass to this workflow
- and of course, the JavaScript code for this workflow
Workflows can be uploaded to the Skydive API through a YAML file. Let’s create the corresponding file create-capture.yml for our previous example.
---
name: "CreateCapture"
description: "Create captures on all the nodes of a path between two selected nodes"
parameters:
  - name: source
    description: Source node
    type: node
  - name: destination
    description: Destination node
    type: node
source: |
    function CreateCapture(from, to) {
        var capture = new Capture();
        capture.GremlinQuery = "G.V().Has('TID', '" + from + "').ShortestPathTo(Metadata('TID', '" + to + "'))";
        return client.captures.create(capture);
    }
You will have recognized the JavaScript code of our previous example. Now let’s upload it to the Skydive API:
$ skydive client workflow create --path create-capture.yml
{
  "UUID": "a7e34f4e-9252-4415-70c5-7c872347024c",
  "Name": "CreateCapture",
  "Description": "Create captures on all the nodes of a path between two selected nodes",
  "Parameters": [
    {
      "Name": "source",
      "Description": "Source node",
      "Type": "node",
      "Default": null,
      "Values": null
    },
    {
      "Name": "destination",
      "Description": "Destination node",
      "Type": "node",
      "Default": null,
      "Values": null
    }
  ],
  "Source": "function CreateCapture(from, to) {\n    var capture = new Capture();\n    capture.GremlinQuery = \"G.V().Has('TID', '\" + from + \"').ShortestPathTo(Metadata('TID', '\" + to + \"'))\";\n    return client.captures.create(capture);\n}\n"
}
If we now go the the Skydive WebUI and click on the Workflows tab on the top right, you should be see our new workflow:
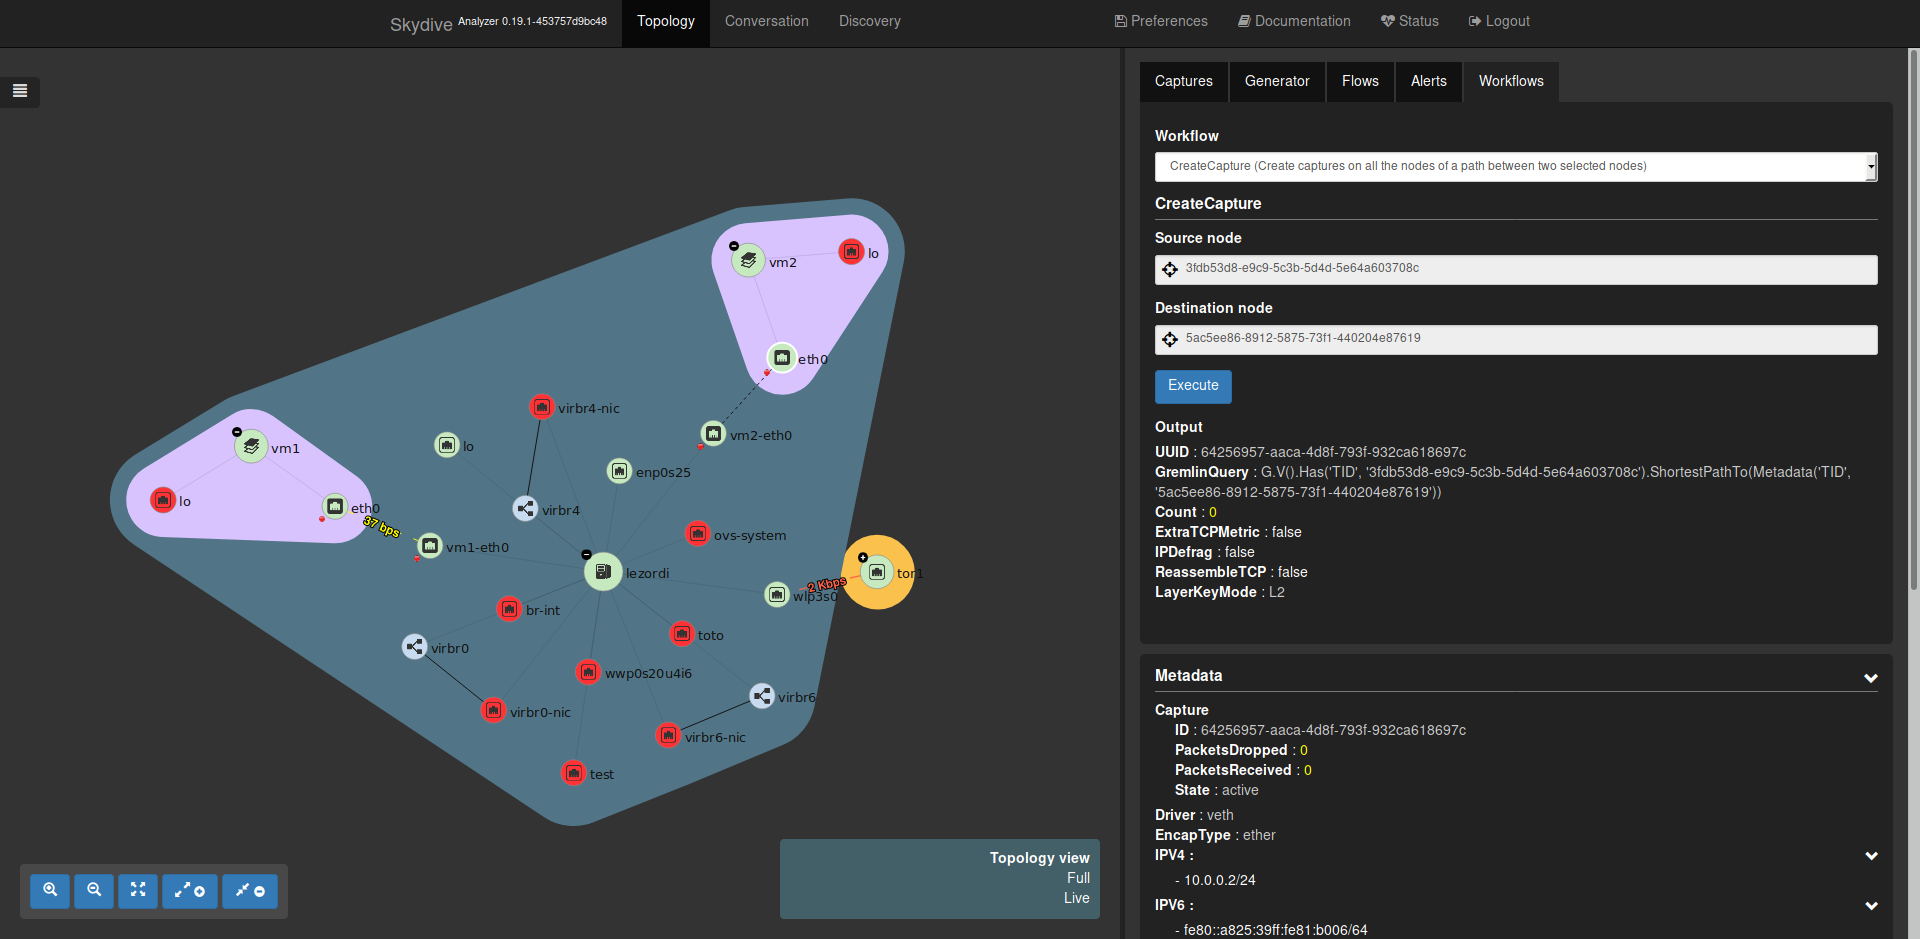
If you select this new CreateCapture workflow, two input fields - corresponding to the parameters of our workflow - will appear.
As our parameters have the node type, they will appear as node selectors. Select a source node and a destination, then click on Execute. The capture should have been successfully created.
Wrapping everything together
Now that we saw how to develop JavaScript code and create the corresponding workflow, let’s move to our real example. As said above, we will use Promises to chain the actions. The JavaScript code for our example could be written like this:
function CheckConnectivity(from, to) {
    var capture = new Capture();
    capture.GremlinQuery = "G.V().Has('TID', '" + from + "').ShortestPathTo(Metadata('TID', '" + to + "'))";

    var packetInjection = new PacketInjection();
    packetInjection.Src = "G.V().Has('TID', '" + from + "')"
    packetInjection.Dst = "G.V().Has('TID', '" + to + "')"
    packetInjection.Type = "icmp4"
    packetInjection.ICMPID = 123
    packetInjection.Count = 5

    return client.captures.create(capture).then(function (c) {
        capture = c
        return sleep(2000)
    }).then(function () {
        return client.packetInjections.create(packetInjection)
    }).then(function () {
        return sleep(2000)
    }).then(function () {
        return client.G.Flows().Has("ICMP.ID", 123)
    }).then(function (flows) {
        console.log("Flows requested ! :-)")
        console.log(flows)
        return { "State": true, "Flows": flows }
    }).finally(function () {
        client.captures.delete(capture.UUID)
    })
}
and the YAML for this workflow could be written like this:
---
name: "CheckConnectivity"
description: "Test connectivity between two interfaces"
parameters:
  - name: source
    description: Source node
    type: node
  - name: destination
    description: Destination node
    type: node
source: |
    function CheckConnectivity(from, to) {
        var capture = new Capture();
        capture.GremlinQuery = "G.V().Has('TID', '" + from + "').ShortestPathTo(Metadata('TID', '" + to + "'))";

        var packetInjection = new PacketInjection();
        packetInjection.Src = "G.V().Has('TID', '" + from + "')"
        packetInjection.Dst = "G.V().Has('TID', '" + to + "')"
        packetInjection.Type = "icmp4"
        packetInjection.ICMPID = 123
        packetInjection.Count = 5

        return client.captures.create(capture).then(function (c) {
            capture = c
            return sleep(2000)
        }).then(function () {
            return client.packetInjections.create(packetInjection)
        }).then(function () {
            return sleep(2000)
        }).then(function () {
            return client.G.Flows().Has("ICMP.ID", 123)
        }).then(function (flows) {
            console.log("Flows requested ! :-)")
            console.log(flows)
            return { "State": true, "Flows": flows }
        }).finally(function () {
            client.captures.delete(capture.UUID)
        })
    }
You can notice that we wait for 2 seconds between the capture creation and the packet injection to give Skydive some time to create the capture on the agent. We also wait a bit before querying the flows to let them enter the agent’s flow table.
The flow query is done using client.G.Flows().Has("ICMP.ID", 123). The JavaScript API mimics the
Gremlin syntax and returns a promise that, when realized, will make a single request to the Skydive
analyzer with the full Gremlin request.
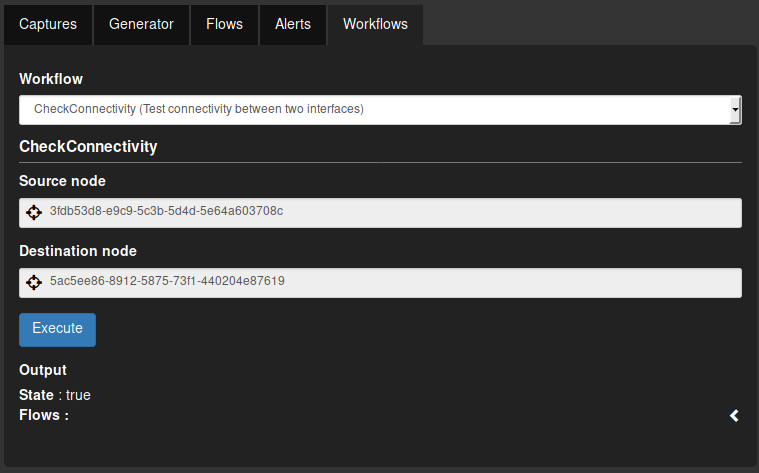
Our workflow returns an object with:
- State: that can be either
trueorfalse - Flows: the ICMP flows that were found
Let’s upload our complete workflow:
$ skydive client workflow create --path check-connectivity.ymlFinally, let’s run our workflow using the WebUI will give the following output:
Conclusion
In this blog post, we saw how to develop our own workflow. A few workflows are already bundled into Skydive such as FlowMatrix which is the flow matrix utility described in a previous blog post, originally written in Python as an external tool that was converted into a Skydive workflow. The list of available workflows is small as the feature was added recently but expect more to appear soon. Don’t hesitate to submit your workflow as a pull request, your help will me really much appreciated.