How to send packets/flows to external tool ?
by Sylvain Afchain, 29/07/2019Sometimes you may want to use Skydive to automate your packet captures but having the flows or the packets sent directly to an external tool.
While Skydive provides since awhile now a mechanism to attach the “original/raw” packets to a flow,
I will describe here another mechanism that we introduced quite recently to expose flow or packets outside of Skydive.
Packet journey in Skydive
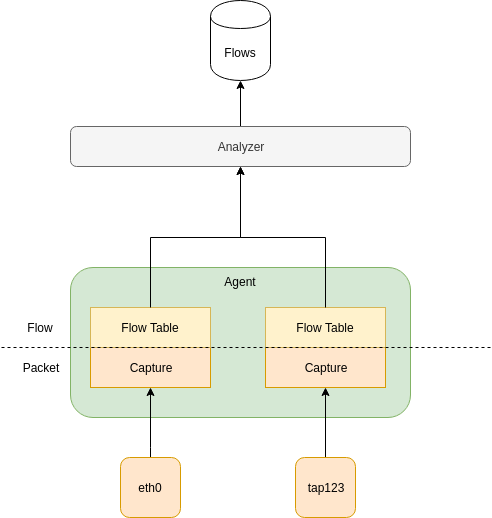
Here I’m going to describe what is an “usual” packet journey captured by Skydive. In Skydive the agent starts the capture whatever the type of the capture, sFlow, eBPF, PCAP, etc. It receives the request of capturing from the Analyzer though an API call. Once a packet has been captured, it is analyzed and placed into a Flow Table in a simpler form. From time to time, according to some config parameters, the flows are forwarded to the Analyzer and then stored in a data store. All of this can be summarized by the following picture.
As explained is this tutorial, it is possible to request for keeping few original packets with the flow.
In that case the original packet will follow the same path, agent, analyzer then data store. while it is useful as it will allow you to use Skydive to request them, etc. you may want to have something more straight forward.
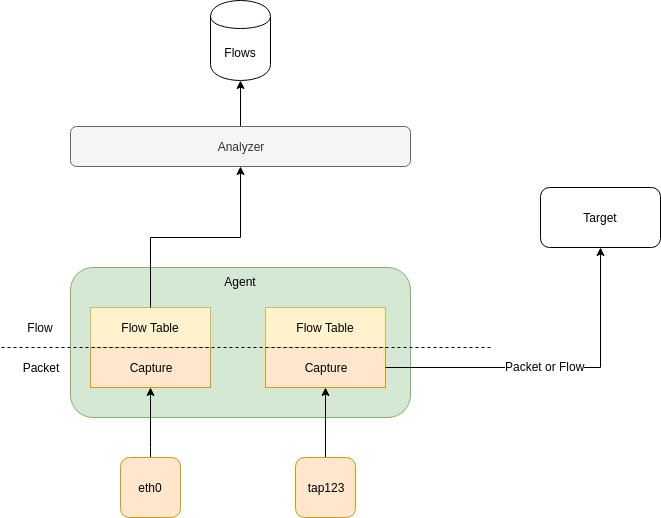
From agent to target
As stated in the introduction we introduced a way to send packets directly from the Agent to an external target endpoint. Currently we support some protocols as
transport for captured packets.
- NetFlow v5
- sFlow
- ERSpan II
With a target the previous picture becomes :
Let’s play with this
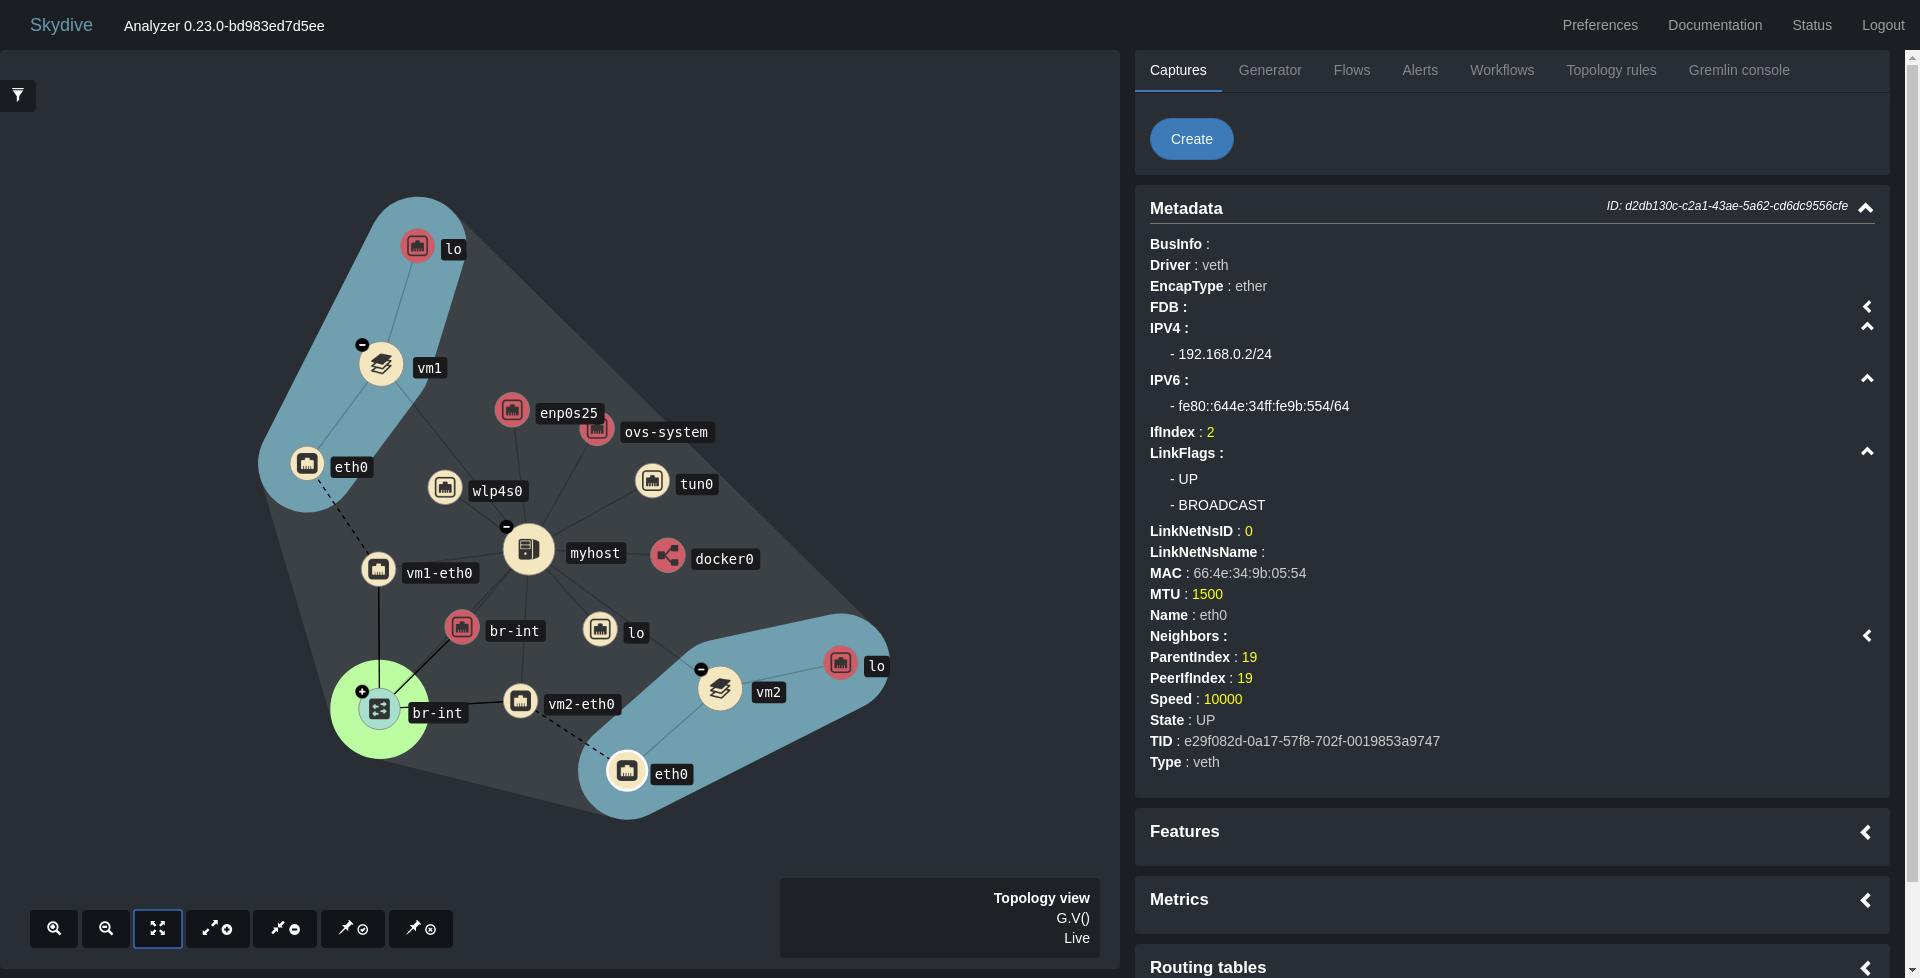
In order to quickly demonstrate this feature I’m going to use a tiny script that creates 2 namespaces connected through a OpenvSwitch bridge. A packet injection will be created from one namespace toward the other one in order to generate a bit of traffic.
The topology looks like this :
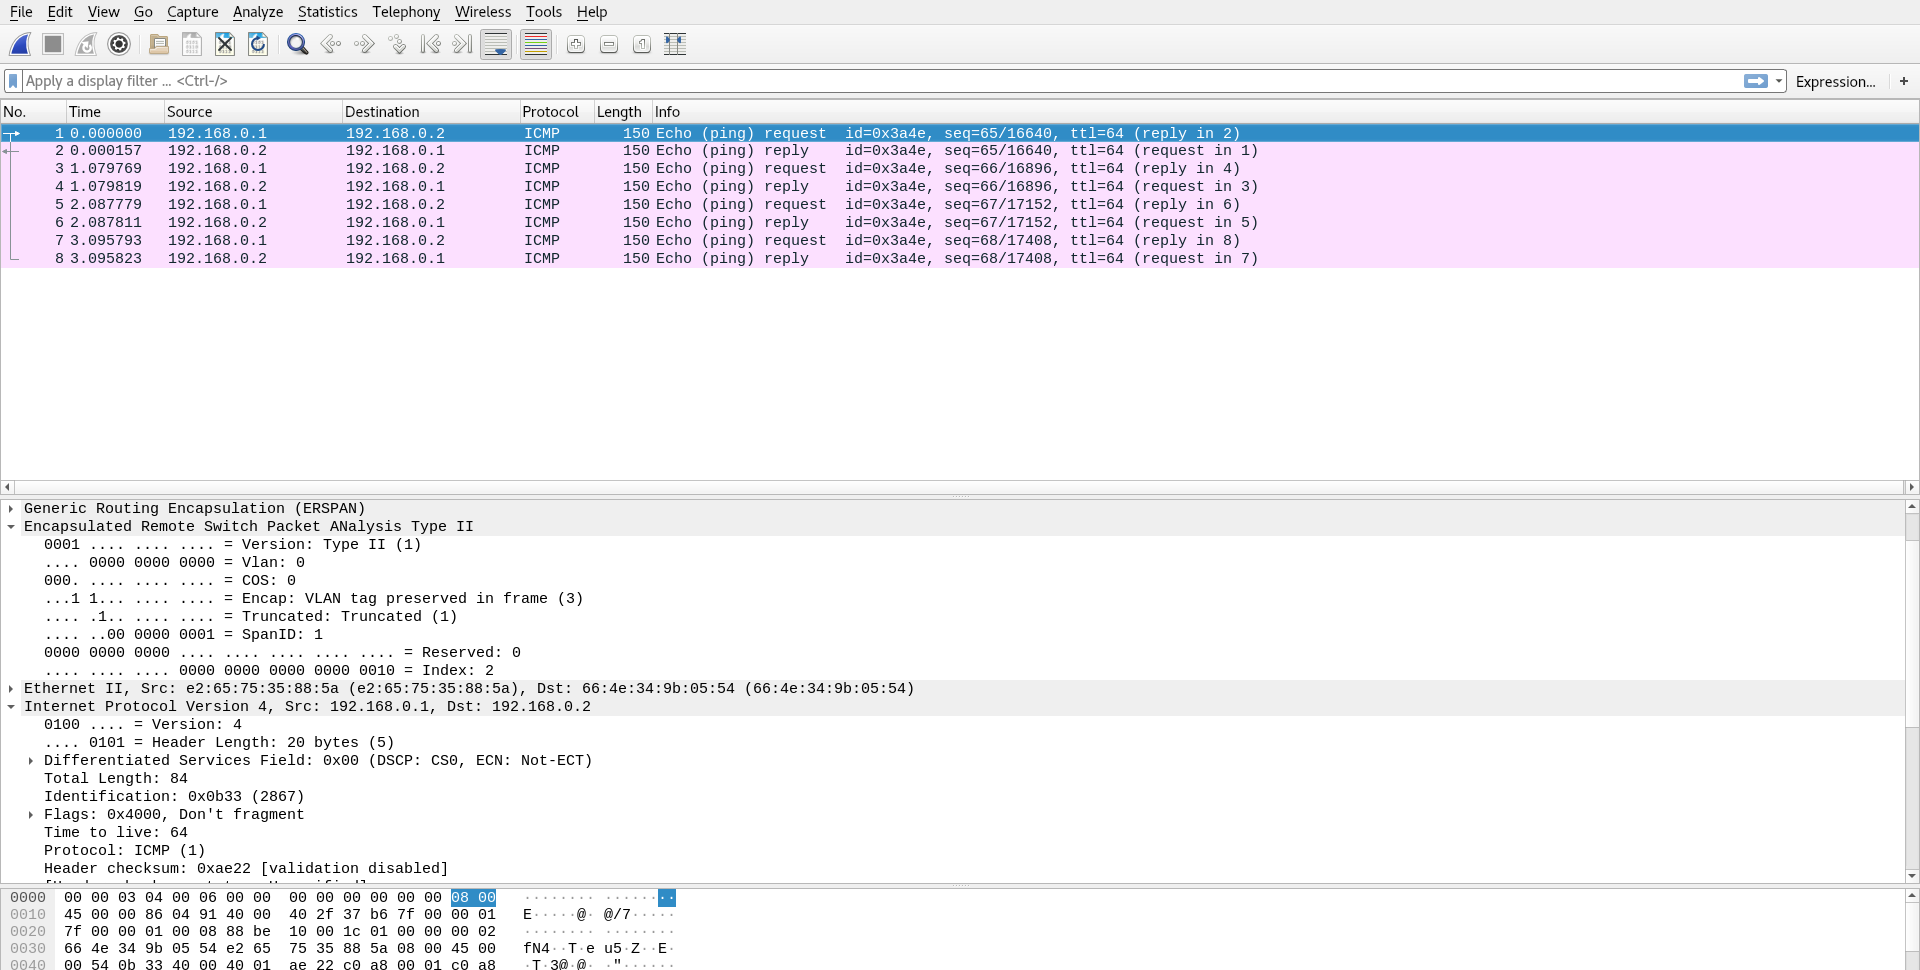
Now I can start a capture from one interface of a namespace specifying one of the target type available. Here I will use ERSpan II
skydive client capture create --gremlin "G.V().Has('Name', 'vm1').Out().Has('Name', 'eth0')" \
  --target 127.0.0.1:0 --target-type erspanv1
Note I used port 0 in the target address as there no port for ERSpan since it uses a GRE encapsulation.
Below what the target endpoint received :
A more complete documentation about the target type is available here
Conclusion
That was just an introduction of target feature and how it is easy to forward all the packets to another endpoint. As we can start multiple captures one same interface we can image to use multiple target endpoints according to specific protocols….